> ## Documentation Index
> Fetch the complete documentation index at: https://docs.clickvote.dev/llms.txt
> Use this file to discover all available pages before exploring further.
# Quickstart
> Add likes to your app in 5 minutes
As an example, we will add like component to [Clickvote](https://clickvote.dev) website.
## Install Clickvote client library
As of now, we have client library only for React. More coming soon.
Get started by installing Clickvote React library:
```bash theme={null}
npm i @clickvote/react
```
## Sign up to Clickvote cloud
Create a free Clickvote account (no credit card required).
 ## Create a new vote
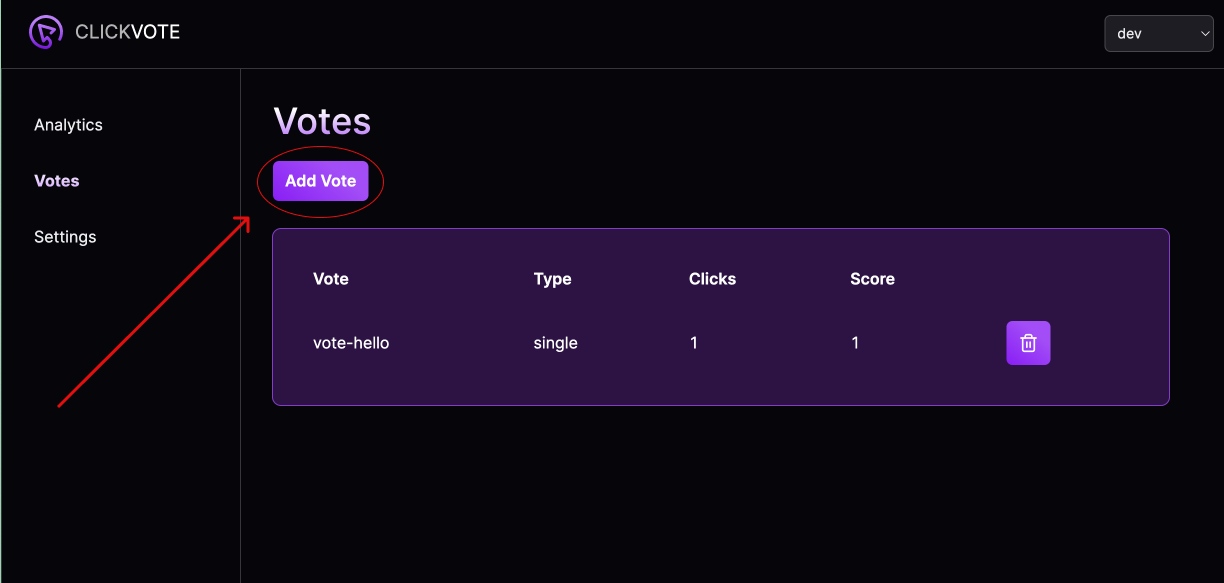
Go to [votes](https://app.clickvote.dev/votes) page to create a new vote. Click on a `Add Vote` button.
## Create a new vote
Go to [votes](https://app.clickvote.dev/votes) page to create a new vote. Click on a `Add Vote` button.
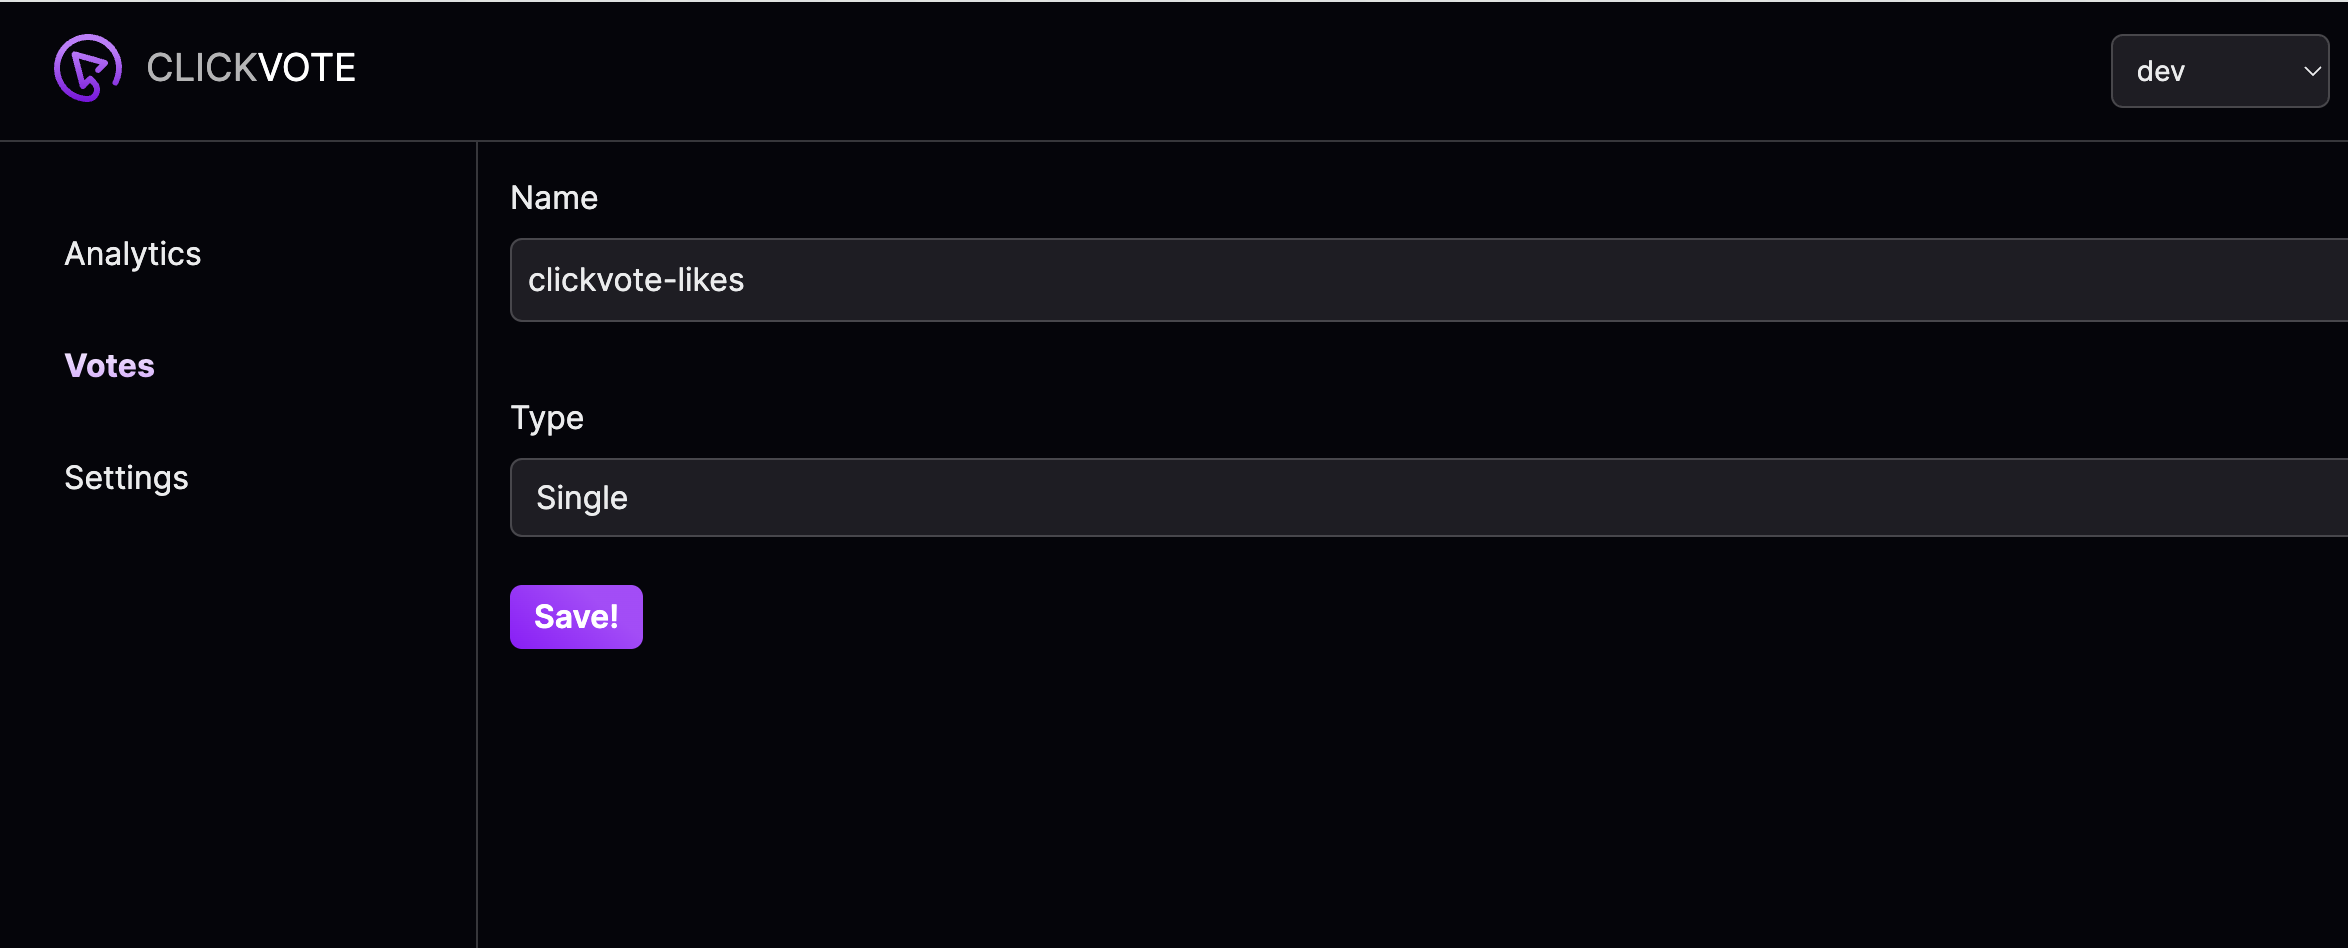
 Give some name to your new vote and select a type (single for likes, range for ratings). Click `Save`.
 ## Integrate Clickvote into a website
After you saved the vote, you should see this page:
## Integrate Clickvote into a website
After you saved the vote, you should see this page:
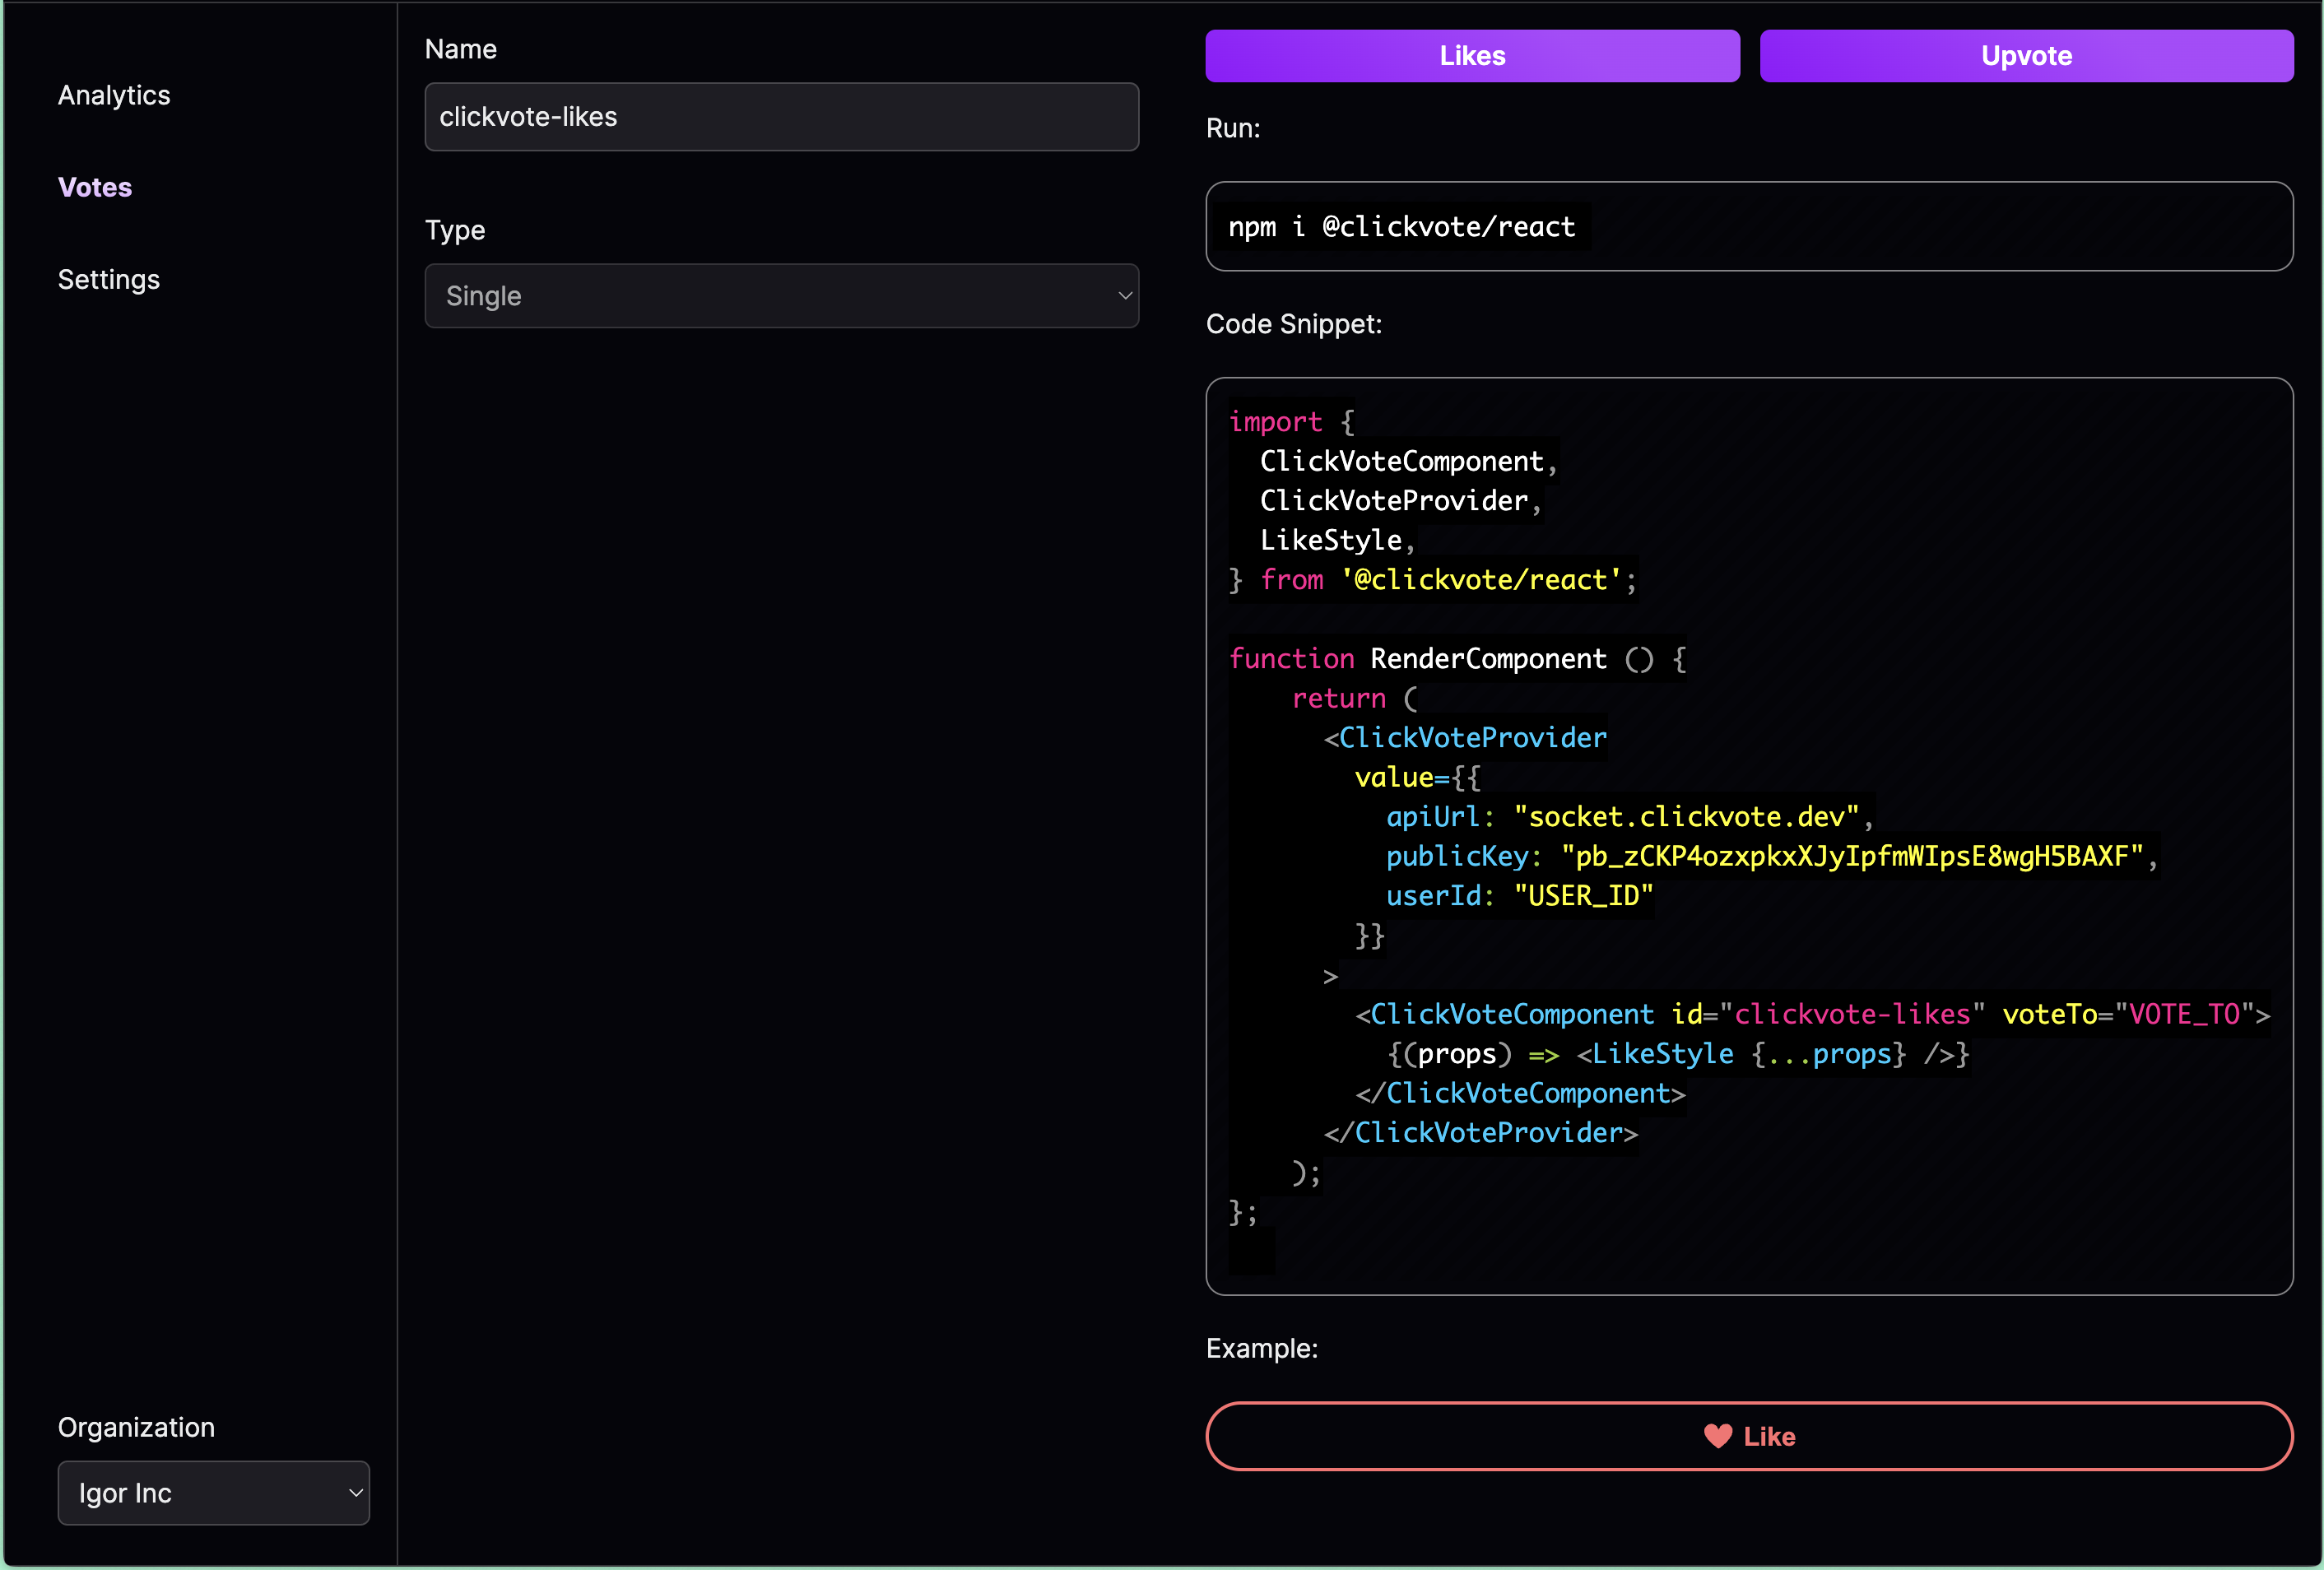 In a top right corner you can select a type of the component you want (likes or upvotes).
Then, you can simply copy and paste provided snippet into your website.
In Clickvote `Vote` actually refers to a group of votes. So for instance, we want to include likes component on every page of Clickvote website.
Obviously, we don't need to create a new vote for each of the pages.
All the components will share the same `id`, but they will have different `voteTo`. Basically, `voteTo` indicates an item inside of vote group.
It can be any string, for example name of the page or URL:
```jsx theme={null}
return (
{(props) => }
);
```
Another important attribute is a `userId`. Currently Clickvote requires it to identify user and prevent the same person from doing multiple votes.
After you added this snippet to your website, you should see a live clickable component.
**Yay, you just integrated Clickvote into your website!**
## Next steps
Check out our guides to learn more about Clickvote:
* [Using with React](/guides/react)
* [Setting up development environment](/development)
In a top right corner you can select a type of the component you want (likes or upvotes).
Then, you can simply copy and paste provided snippet into your website.
In Clickvote `Vote` actually refers to a group of votes. So for instance, we want to include likes component on every page of Clickvote website.
Obviously, we don't need to create a new vote for each of the pages.
All the components will share the same `id`, but they will have different `voteTo`. Basically, `voteTo` indicates an item inside of vote group.
It can be any string, for example name of the page or URL:
```jsx theme={null}
return (
{(props) => }
);
```
Another important attribute is a `userId`. Currently Clickvote requires it to identify user and prevent the same person from doing multiple votes.
After you added this snippet to your website, you should see a live clickable component.
**Yay, you just integrated Clickvote into your website!**
## Next steps
Check out our guides to learn more about Clickvote:
* [Using with React](/guides/react)
* [Setting up development environment](/development)